A Bead, Indeed!

Fiber Art Beads

Want to add dimension and lots of visual interest to your projects? Fiber art beads will do the trick. There are many ways to create these little gems, but here is the way that I make them.

You will need the following supplies:

plastic drinking straws
fabric glue
fabric scraps
assorted yarns or fibers
beads
craft wire, 22 or 24 gauge

Begin by cutting your straws into 1 1/2″ widths (or whatever size you desire). Cut fabric scraps on the bias about a quarter inch wider than your straws and about 4 inches long. Dab a little fabric glue on the straw and begin wrapping the fabric around it. Reapply more glue as you wrap the fabric.
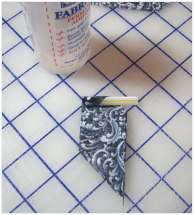
Wrapped Bead

Wrapping fabric around plastic straw

Check to make sure the fabric is completely secured with fabric glue. This add stability and a little stiffness to the beads.
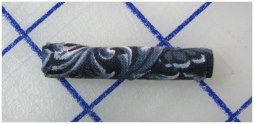
Wrapped Straw

Wrapped Straw Piece

Cut some stands of various yarns or fibers. Place a small dab of fabric glue at one end and secure the end of the first yarn. Wrap the yarn around the bead in a spiral motion. Secure the end with fabric glue. Repeat this step for additional yarns.
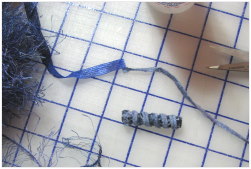
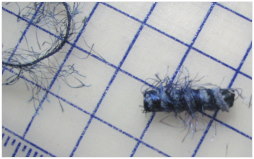
Yarns

Secondary yarns

Wrapped Yarns

String craft wire through the center of the straw and wrap it around the exterior of the bead, leaving about a one inch tail. Twist the tail around the center wire to secure.
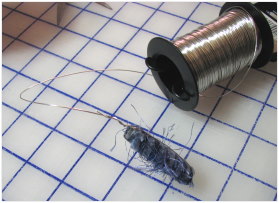
Twisted wire

Wrapped Craft Wire

Measure out about 10 inches of wire from the end of the bead and cut.

Cut wire

String various size beads onto the wire and begin wrapping them around the bead in a spiral motion. I like to string a few beads at a time, wrap, and then repeat the process until I come to the opposite end of the bead.
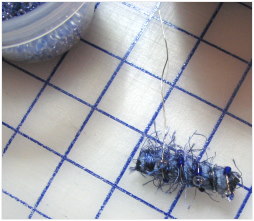
Stringing beads

Stringing Beads

Once the beading is complete, push the wire end under the original wrapped wire and twist it back on itself to secure. I like to push the end of the wire into the bead so that there are no sharp edges on the surface of the bead.
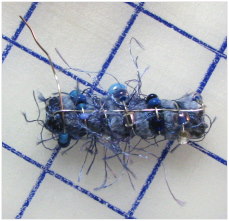
End wire

Securing End of Wire

You may like to experiment with Angelina “fabric” rather than cloth. Also, try wrapping ribbon rather than fabric. Metal beads and other embellishments can be used in place of glass beads. Craft wire comes in many colors, so don’t limit yourself to silver and gold.

Note: I want to thank you again for your many comments, emails, and prayers for my family during this difficult time. My mother’s condition remains the same; we just take it one day at a time.

~~~~~~~~~~~~~~~~~~~~~~~~~~~~~~~

Rene

Time Treasured

Fabrications – All in a Row (part two)

For the flower centers, I used a similar Stitch Witchery technique. First, I cut a small square of fabric and Stitch Witchery. I then backed the fabric square with a fusible interfacing.

Stitch Witchery

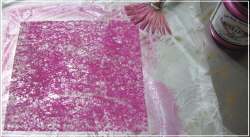
Second, I painted the Stitch Witchery square with Lumiere Pearl Magenta.

Painted Stitch Witchery

Third, I dropped some metallic threads on top of the fabric square. I then topped it with the painted Stitch Witchery and covered the layers with parchment paper. I pressed them on a wool setting for about 10 seconds.

Metallic Threads

Fused Threads

Using a small circle template, I penciled cutting outlines on the back of the fabric and then cut out the circles.

Marked interfacing

Next, I placed the circles on the background fabric in a somewhat random fashion. The only important thing here was to leave enough room between them for the petals. When I was happy with their positions, I tacked them down with a tiny dab of fabric glue so that they would stay in place as I continued working.

Placement of Center Flowers

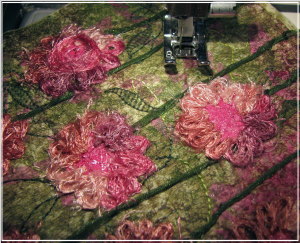
The next step was the flower stems. I decided to use green quarter-inch organza ribbon. To get a nice rounded shape, I twisted the ribbon as I couched it down using the Bernina free motion couching foot. (This could be done just as easily with a cording or braiding foot or an open toe foot.)

Couched Organza Ribbon

The flower petals were created with Moda Dea Jai Alai (Bloom) eyelash yarn. I couched the yarn around the center, first working in a loopy motion to form the petals and then taking a final round at the outer edge of the center.

Free Motion Couched Yarn Petals

A free motion couching foot would be necessary to apply the yarn exactly as I did. However, you could achieve very nice petals through bobbin work with perle cotton or another heavy thread or fiber of your choice. To do this, sew a straight stitch around each circle. Wind your bobbin by hand and then prepare your machine for free motion work. Turn your fabric to the wrong side and stitch the petals around the previous sewing lines. (It’s always a good idea to work on a test piece first to make sure your tensions are correct.)

When my flowers were complete, I chose a leaf stitch on my sewing machine and added leaves to the stems. I could have thread painted the leaves, but sometimes I like to use the built-in stitches on my sewing machine simply because they so often go unused!

Machine Stitched Leaves

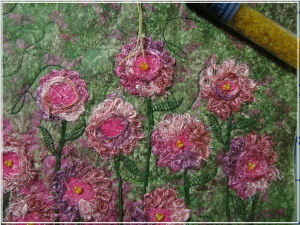
To complete the piece, I added a yellow glass bead to each flower. Instead of sewing the beads on with the hole to the side, I stitched them with the hole facing up and used a lighter yellow thread. The stitches formed a small “Y” design on the surface of each bead.

Bead Work

I really liked the role that Stitch Witchery played in this project. It performed well both as a fusible and as a paint transfer medium without leaving its own footprint.

Note: I’ve added another colorform file (fjsquare.dst) to the Fem-Gratis box in the sidebar. Enjoy!

~~~~~~~~~~~~~~~~~~~~~~~~~~~~~~

Rene
Time Treasured

SaveSave

Quick Tips – How to Knit on the Go

I knit all year long and like to carry my projects with me for appointments, when I travel , etc. I’ve tried several methods of keeping my yarns neat, tidy, and convenient all at the same time and found that an empty 5 quart plastic ice cream container works best.

I usually work with more than one yarn at a time, so the ice cream container supplies plenty of room for my multiple balls or skeins. Using a regular hole punch, I created three holes at the outer edges of the top, separating them equally. The yarns flow freely from each hole and never tangle. The container already has a carrying handle, so I’m good to go at all times.

Of course, I had to embellish the container, so I pasted a pretty floral picture over the “Vanilla” imprint.

~~~~~~~~~~~~~~~~~~~~~~~~~~~~~~

Rene
Time Treasured

Felted Finery – Angel Petals (part two)

Angel Petals is a three-layered flower consisting of a felted wool center sandwiched between two layers of Angelina. To create the Angelina layers, pull some fibers from a mix of Angelina “Hot Fix” colors, and place them on a piece of parchment paper or a Teflon pressing sheet. I used Raspberry Sparkle, Cotton Candy, Sugar Plum, and Violette Crystalina. Pull enough fiber to create two flower layers. Better results are usually obtained when colors are mixed well.

Angelina “Hot Fix” Fiber Mix

Place a piece of parchment paper on top of your mixture and press at a “silk” setting for about 3-4 seconds. Let cool and then check to see if all the fibers bonded. You should have a nice piece of flat iridescent fabric.

Angelina Fabric

For the next step, make a new four-petal flower template a little smaller than the template used in step one. Place the template on the Angelina fabric and cut out two flowers. If your piece of Angelina isn’t large enough for two flowers, simply repeat the previous step for the second flower. (Remember to save your scraps for future projects.)

Cut Angelina Petal Layer

Attach the Angelina layers to the top and bottom of your flower center with a tiny dab of fabric glue placed strategically at the outer area of the flower centers. Offset their position so that the petals fall between the felted flower petals. Just a slight touch of glue will do the job since the edges of the cut Angelina will naturally want to adhere to the felted wool. Also, you will be felting the center of the flower, so keep the glue clear of this area.

Sandwiched Flower Layers

Next, cut a small circle of craft felt for the flower backing.

Craft Felt Backing

Attach it to the back of your flower using the method above. Just a touch of glue will do the job since this piece will be secured by the felted center.

For the fluffy center, cut six short strands of yarn in a contrasting color. I used a yellow boucle. Any yarn that can be pulled apart should work well.

Position two strands in the center of your flower front, forming an “X” shape. Lightly felt them in place with you needle punch machine, keeping the flower stationary and only felting the very center.

Felting Yarn Strands

Now take two more strands of yarn and wrap them with a coordinating color of Angelina. A few twists should do the job.

Angelina Wrapped Yarn Strands

Place them in an offset position on top of the previous felted strands of yarn and needle punch them in place. Use the last two strands of yarn to fill inany open areas.

Check the back of your flower to make sure the yarn has felted through to the back. Using your fingers, pull the yarn strands apart until they fluff up and fill the center. You can cut the strands to any length you desire.

Felted Through to the Back

To complete your flower, sew a brooch pin on the back, using a strong polyester thread. I like to place a little glue on the pin before sewing so that it stays in place.

You now have a beautiful little flower to give as a gift or to embellish your summer wardrobe.

~~~~~~~~~~~~~~~~~~~~~~~~~~

N. Rene West
Time Treasured

Felted Finery – Angel Petals (part one)

Embellishment Village now offers a new crimped “Hot Fix” Angelina in twenty colors. The individual fibers are finely cut and wavy.

New Crimpled “Hot Fix” Angelina

Their website states that the crimped Angelina has a softer texture when bonded and drapes nicely. Additionally, the colors are more intense, adding a little more glitz to your projects. I’m not so sure Angelina really needed more glitz, but someone must have thought more is better at EV.

I received a shipment a few weeks ago and have been excited about using the new product in a project. I believe I ordered all twenty colors!

To make the Angelina felted flower, you will need a few colors of roving (mine drank the Kool-Aid), a few colors of Angelina (regular or crimped), and some yellow yarn, such as boucle.

Angelina and Wool Roving

Begin by drawing a simple four-petaled flower to use as your template. Give it enough of a center to attach other pieces during later stages. Draw around your template on a piece of lightweight stabilizer. I painted my pink so that it would blend with the flower. ( A used dryer sheet would work.)

Template Outline on Light Weight Stabilizer

Pull out a small amount of roving with which to fill in your felted flower. Mix in some Angelina strands, using pulling and folding motions until you have a well mixed ball. Shape the roving mixture to fit within the outline as you needle felt it with your Babylock Embellisher or other needle punch machine.

First Layer of Felting

When you complete the first color, pull roving and Angelina in a second color, mix it as described above, and felt it around the inner part of the petals to add more visual interest.

Second Layer of Inner Petal Felting

Cut your flower out with a sharp pair of craft scissors, removing the outline as your cut.

In part two, we’ll create the Angelina petals and fluffy center.

~~~~~~~~~~~~~~~~~~~~~~~~~~~

N. Rene West
Time Treasured

Felted Finery – Floral Fluff (part three)

The technique that follows is my favorite parts of this project. Adding fluff to the center of the flowers is both easy and quite versatile.

First, mark the center of your organza covered flowers with a chalk marker.


Choose a yarn that will fluff, such as a boucle for the next step. Cut five short strands of the yarn.

Place two strands of the yarn in the center of one flower, making an “X” shape. Using your Babylock Embellisher or needle punch machine, tack the yarn down in the very center. Don’t over do it; just secure the yarns.

Now place the three remaining strands of yarn over the previous strands, filling in the bare areas. Needle punch them in place securely. Check the back of your work to make sure the fibers have come through sufficiently.

Separate the fibers with your fingers until they fluff out nicely. You can give them a haircut if you would like or leave them bushy. You might like to play with this method and take note of the different effects you get when altering the length of the yarn fibers.

For the stems, I used the bottom of a large thread spool to mark curved areas around my flowers.

I then choose a stitch on my machine that has the appearance of couching (#157 on the Bernina Aurora 440). You can use any stitch you like to accomplish the same thing. Simply follow you markings and then end the stitching with a few securing stitches.

To add a little embellishment to the stems, thread a needle with a strong sewing thread and sew a bead at each end.

Another project complete! The little fluffy flowers work well on quilts, decorator pillows, handbags, totes, hats, and other items that are conducive to 3D embellishments.

~~~~~~~~~~~~~~~~~~~~~~~~~~~~~~~

N. Rene West
Time Treasured

Fabrications – Gilded Gardens (part five)

Our colorful garden is almost finished, but a few remaining embellishments are in order. This is one of those projects that says to us, “The more, the merrier.”

With the heavy thread work behind us, we now turn to filling some of our flowers with felted or couched yarns, adding some yarn to a few of our leaves and to our background, and capping it all off with beads or French knots.

Take a look at your work and decide which flowers you would like to embellish with yarns. For visual interest, select several different colors and audition them until you find just the right ones for your project. I used spun roving, chenille/eyelash mixes, and brushed yarns.

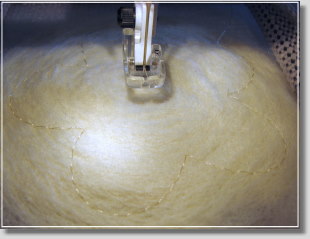
Beginning with any flower other than the center, needle felt as much or as little yarn as you like within its center area. On the flowers that I completely filled, I began by tacking down the end of my yarn in the center and then slowly working in a spiral motion until the yarn reached the edges. You don’t need many stabs of the needles to do this. The goal is to secure your yarns but not to completely felt them with the background.

Felted Flower

Spiral Felted Flower

On other flowers, needle felt smaller amount of yarn and leave some of your flower background showing. On still others, mix your yarns so that the flower is multicolored.

Before working the center flower, needle felt some spun roving (or other fiber) in a radiating design out from the edges. If your center flower has leaves, needle felt or couch a special decorative fiber down the center vein. I used wrapped silk cords.

Wrapped Silk Cords

Wrapped Silk Cords

Then fill your flower with various yarns. With a contrasting color, needle felt a colorful center.

Center Flower

Center Flower Motif

Now take some green furry yarn and felt or couch it along the edges of your leaves just as you did with the heavy thread in part four, working past the leaf tip and meandering here and there.

Couched Yarn

Look at your work and see whether there are areas that need to be filled. For the look of tiny flower buds, I took small pieces of roving, twisted them into a tight little ball, and needle felted them in place. I also meandered spun roving and needle felted it in place.

For the final embellishment, do some bead work down the center vein of a leaf or two, at the center of some of your flowers, and any place else you would like some bling. As an alternative or an additional embellishment, work some French knots in the center of flowers.

Bead Work

Bead Work

Congratulations! Your garden is now complete. I hope you loved doing this project as much as I did.

~~~~~~~~~~~~~~~~~~~~~~~~~~~~~~~

N. Rene West
Time Treasured

Fabrications – Gilded Gardens

Gilded Gardens

Spring has arrived in the Blue Ridge Mountains and spotted the landscape with majestic purple crocuses, golden yellow daffodils, and soft white cherry blossoms. All of this beauty followed me into the studio, so out came the threads, fibers, yarns, and colorful fabrics.

This multi-layered project is not for the faint of heart. However, if you hang in there, you will be rewarded with a beautiful piece of art that is worthy of your signature and a frame. Mine is actually destined to be a pillow, but you could use the following techniques for a quilt, a handbag, or any number of other items.

Additionally, you could break the project down into smaller parts and use a few flowers and leaves rather than the large number that I’ve included. I also found that each stage of work looked complete in and of itself, so you could stop at any point you desired.

For this fiber play, you will need some flannel and several background fabrics that are hand dyed, hand painted, or have the same look as these do. You will also need embroidery weight threads, perle cottons, roving, yarns, and embroidery floss (silk or cotton).

Perle Cottons

Perle Cottons

Yarns

Assorted Yarns

I used silk cords and beads as well, but these are optional. You may have some other wonderful fibers on hand that you would like to use in this project.

Silk Cords

Silk Cords

The first stage of construction involves building your background. After deciding on the size you would like your finished project to be, cut a piece of flannel a little larger than your measurements. Then begin cutting pieces of fabric to fill the space. You can back your fabrics with a fusible or with a heavy stabilizer. If you choose a fusible backing, iron your pieces onto the flannel. If you choose a stabilizer, attach your pieces by using a little basting glue or a spray adhesive such as 505.

Fabric Placement

Most everything about this project is free form. Relax and enjoy each stage, setting precision aside for another day. If there are small gaps here and there, don’t worry about it. These will be covered with a flower, a leaf, or some other decoration.

When all of your background fabrics are in place, you might like to add one more layer of interfacing/stabilizer to the back. I used a light weight stabilizer that I applied to the flannel with a basting spray. The purpose of the flannel and stabilizers is to provide stability for all the stitching that will cover the surface. Also, if you decide to hand or machine felt some of your pieces (a later stage of this project), both of these backings give the fibers something with which to mesh.

In part two, we will fill the background with flowers and leaves and begin the next stage: thread work.

~~~~~~~~~~~~~~~~~~~~~~~~~~~~~~~

N. Rene West
Time Treasured

Fiber Folio – A Yarn’s Life (part two)

Stencil Outline

Taking another stencil, I repeated the previous process, only this time I turned the stencil diagonally to add a little visual interest to this simple design.

Tacking Stitches

Yarn Cross

I wanted a different look for this piece, so I used the braiding technique that I posted in an earlier tutorial. Using two skeins of Neon Felt It, I tacked down the beginning edges of the yarn and then crossed the yarns every three stitches.

Braid Complete

The colorful variegations combined with the curves of the design resulted in a piece that needed no added embellishment. That being said, I do think a little stippling or meandering inside the curves with a specialty thread might also be nice. If it were the surface of a quilt, I might add a different fabric inside each space delineated by the curves (and I would use a different fiber for the braiding, possibly silk).

Felted Flowers

With yarn to spare, I moved on to a completely different project. I had some needle felted flowers that I had made previously using the technique from Natural Blooms.

Felted Sprial Flowers

I set up the Babylock Embellisher with three needles. Next, starting in the center of the flower, I tacked down the edge of the yarn. Then I slowly moved in a spiral pattern, lightly felting the yarn to the flower.

Felted Petals

For the petals, I simply looped the yarn and continued felting. When the flower was complete, I tucked the tail of the yarn under some previous felting and did a quick tack down.

Felted Flowers

Don’t these look like decorated sugar cookies? In the second flower, I skipped the spiral center, felted the petals, and then tacked down cut pieces of yarn. A little fluffing and my flower was finished.

Knitted Scarf

This yarn was just too pretty to put away, so out came the needles and you know the rest of the story.

~~~~~~~~~~~~~~~~~~~~~~~~~~~~~~

N. Rene West

Time Treasured Read the rest of this entry »

Fiber Folio – A Yarn’s Life

Yarn

I found these skeins of spun wool roving at the store last week. With a name like “Felt It,” I knew I had to take them home with me. I immediately saw their potential as detail yarns in needle felting projects, but I knew they would surprise me with many other talents as well.

Recently, I had been looking at all those old quilt stencils hanging on the back of the studio door. If you’ve been quilting for any amount of time, you probably have a collection of them yourself. So I took a few off the rack and decided to put them to work.

Stencil

First, I cut two pieces of 100% wool fabric that had already been through the fulling process in my washing machine. Taking the first stencil and a #2 pencil, I lightly outlined the design onto the wool.

Felted Stencil Design

Next, I took the “Wildflowers” yarn and needle felted it along the outline with the Babylock Embellisher.

Machine Stitch

The felted design looked rather nice just as it was, but I wanted to play with it a little more. I chose a decorative stitch (#113 on the Bernina Aurora 440 QE) and stitched around the felted outline, using a royal blue 40 wt. matte embroidery thread. What a dramatic difference that made! Not quite ready to call it a day, I then took some Czech glass beads and attach them to the outline by machine.

Bead Work

Attaching beads by machine can be a little tricky at first. For this project, I set my machine on a blanket stitch (the stitch often used around appliques) and counted four left swings of the needle, setting my bead inside the presser foot (a Babylock braiding foot) at the beginning of the fifth swing. Using my right hand to turn the wheel, I carefully guided the needle into the hole of the bead and back to the right again and continued this way until I had completed the full design. I could have chosen to attach the beads by hand, but I thought the blanket stitch might work well with this particular design.

I was pleased that I had found a secondary use for the quilting stencils. Although I worked on wool yardage, the process would be the same on the surface of a quilt. Such wonderful textures can be created playing around with this technique.

Knitted Scarf

With quite a bit of the skein left, this yarn still had work to do. I paired it up with a furry little novelty yarn that matched perfectly and began knitting a scarf. It was pure pleasure.

(to be continued)

~~~~~~~~~~~~~~~~~~~~~~~~~~~~~~~

N. Rene West
Time Treasured

Felted Finery – Natural Blooms (Part Two)

With four felted circles completed, I was now ready to begin embroidering the flower outline that I had previously digitized for this project. The flowers measured 90mm and the stabilizer was already part of the felting process, so all I had to do was hoop each circle and push the start button.

Embroidery Outline

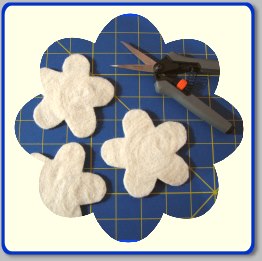
After the outlines completed stitching, I took by little pair of Fiskars clippers and began carefully cutting out each flower just inside the stitching line. This is easy to do and results in tidy shapes every time. Also, all those little pieces that fall away as I cut can be gathered up for another project, such as a little felted flower embellishment. This process could also be accomplished with a template and a fabric marking pen, so an embroidery machine isn’t an essential part of the method.

Cut Flowers

Once the flowers were completely cut out, I flipped them to their reverse sides, which now became their front sides. Felting produces a two-sided fabric; one side will be more textured than the other. Usually the reverse side has a smoother appearance, and this was the look I desired for my flowers.

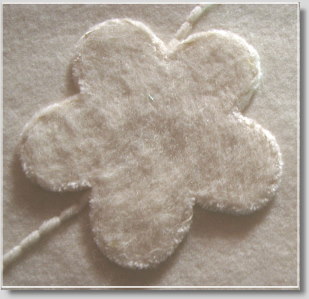
Next, I picked out a medium weight chenille yarn that was wrapped in rayon thread. Rather than couching or machine felting the yarn, which would have changed its appearance, I chose to attach it to the edges of my flowers with a light touch of permanent fabric glue (easily accomplished with a thin bamboo stick).

Edge Embellishment

For the base fabric, I chose natural 100% wool yardage that had been previously felted in the washing machine. This piece will eventually become a handbag, so I backed it with Decor Bond, a heavy fusible stabilizer.

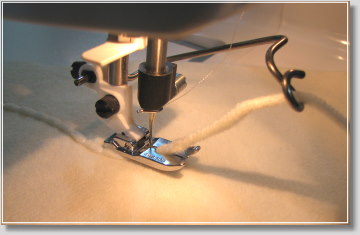
I auditioned several yarns for the couched vines, but finally decided upon an Italian cable twist wool, liking its round quality. I then attached a braiding foot and a braiding guide to my sewing machine and threaded it with a natural color rayon thread. The braiding guide is optional but it sure helps. I used the following machine settings:

Stitch – Blanket Stitch
Stitch Length – 4.5mm
Stitch Width – 4.0mm
Upper Tension – 2.6

Braiding Foot and Guide

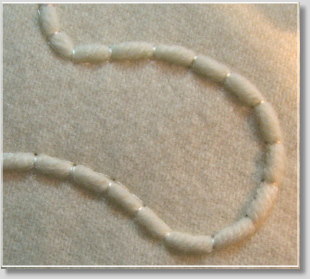
I could have sketched a winding pattern to follow on the base fabric, but instead I just took my time and formed winding curves as I stitched. The beginning and ending stitches were deliberately placed so that a flower would cover them. After completing the couching, I gently brushed the yarn towards the stitching so that the one-sided straight stitches were covered.

Couched Wooll Cable

I placed the first two flowers over the beginning and ending stitches, measured their edges from the side of the fabric to make sure there was plenty of seam room (about a 2 inch allowance), and then placed the remaining two flowers here and there until I found positions that visually pleased me. Again, I didn’t want to change their appearance in any way by machine felting them, so I attached them with fabric glue.

In part three, my natural blooms will receive some additional embellishments.

~~~~~~~~~~~~~~~~~~~~~~~~~~~~~~~

N. Rene West
Time Treasured

Yarn duet

My quilting group went on a field trip to Black Mountain last year. The destination was a local quilt shop, but we noticed a yarn store around the corner. If you’re a knitter, you know the feeling of walking into a new world of wonderful yarns and fibers that all require close examination and the touch test. Of course, this can take hours and hours. This particular store and numerous isles as well as walls full of their precious product.

Well, when my group had completed their tour, I had only reached isle two! All this to say, I love yarns and fibers and the synergy they produce when combined. Maybe it’s the surprise effect that unfolds as I knit those first few rows.

Scarf 3 Colors

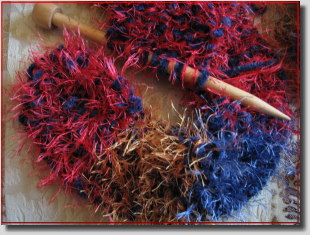
Over the weekend, I combined a thick blue chenille with a variegated eyelash. The eyelash contained three colors: red, blue, and golden yellow. When I measured the length of the individual colors, I was surprised to find that they were approximately 160 inches long. That accounts for the nice wide bands of color in this scarf. I may knit another scarf using red chenille with the same eyelash and see what happens.

~~~~~~~~~~~~~~~~~~~~~~~~~~

N. Rene West
Time Treasured