Shiva Paintstiks allow us to transform a plain fabric into something eye-catching and beautiful. Possibly you’ve seen the application of Shiva’s iridescent paintstiks on a black background and the striking results.
In this project, I’m taking you in the opposite direction by using the color white. If you’ve ever admired shadow appliqué, you will appreciate the similar effects that you can achieve with a white Shiva Paintstik. In shadow appliqué, various colors of fabric are placed on the wrong side of a sheer fabric, allowing the design to show through. The outline of the shape is then stitched on the right side of the fabric along with some embroidery embellishments, resulting in a delicate, pristine surface design.
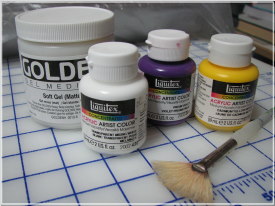
For this project you will need freezer paper, a pastel background fabric (I used a Kona cotton), Shiva Paintstiks in white and yellow, rayon thread, and some beads.
Begin by drawing a simple design on a separate piece of paper. I started with a circle and then formed petals to create my flower. Cut the design out and transfer it to the matte side of the freezer paper using a pencil or marker. Cut the design out of the freezer paper, making sure your design edges are smooth.

Place your freezer paper design shiny side down on the right side of your fabric and press with a warm iron until the paper fully adheres to the surface.

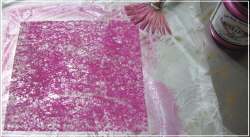
Next, prepare a work area just as you would for fabric painting, making sure the surface is protected. Secure your fabric with tape to a hard flat object, such as a large tile or plate of glass. Remove the thin skin from your white Shiva Paintstik (see part one) and gently color in the design area. You can apply the paintstik directly or you can use a stencil brush. Your design won’t look all that wonderful at this stage, but that will soon change.

Now add a yellow center to your flower using the original pattern template with the center cut out. You don’t have to wait for one color to dry before using another. With Shiva Paintstiks you can layer colors simultaneously or blend colors together to produce new colors.

Once your design is complete, peel off the freezer paper. If there are any flakes of skin residue, remove them with a point of a knife or similar object.

At this point I detour a bit from the usual directions by placing my design between two paper towels and lightly pressing (silk setting) for about 6 seconds. This is not for the purpose of heat setting but rather to even out the painted design. By doing this, your design will lose its grainy look and take on a solid, smooth appearance.
You must now set your design aside and allow it to dry for a few days. Once dry, heat set by again placing it between paper towels (or paper bags) and ironing for about 15 seconds on each side. Use the heat setting appropriate for the background fabric.
To remove any remaining chemical residue, wash your design in cold water with a small amount of detergent. You can do this in a washing machine, but I prefer to do this by hand and then lay the design on a towel to dry. You can also dry your design in a clothes dryer set at the low heat setting.
Once you’ve completed the washing process, your design is ready for some embellishing. Begin by stabilizing your fabric. I use a fusible cotton tear away purchased from ABC Embroidery (see Fiber Art Resources page). It’s a wonderful product that I highly recommend, especially to quilters who embellish with embroidery. It’s easy to remove, but can also be left in the design because it’s light weight and softens when washed. Whatever stabilizer you use, take care when removing it from around your stitching.
Set up your sewing machine for free motion embroidery, making sure you’ve dropped the feed dogs. Using a rayon thread (or any decorative thread you like), stitch around the edges of your design. Remember to loosen your top tension when using decorative threads.

Next, move to the center and detail stitch the petals. As a final embellishment, add some beads at the end of each petal detail.

When removing the stabilizer, you may like to leave the part behind your design since the white stabilizer enhances the white of your design. Now, have you ever seen anything so delicate and beautiful?
I hope this little project will serve as a starting point for some great adventures with Shiva Paintstiks. In part three, I’ll share some other simple tools that I use to create surface designs with Shiva Paintstiks.
~~~~~~~~~~~~~~~~~~~~~~~~~~~~~~
N. Rene West
Time Treasured