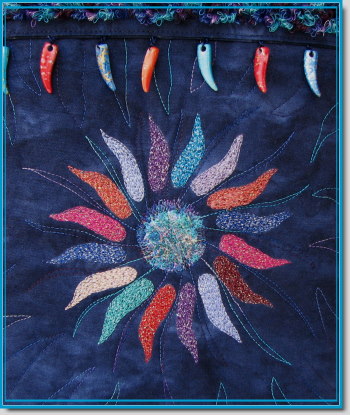
Working with unusual fibers stretches my creative thinking. In fact, I often have trouble falling asleep at night because my brain refuses to stop thinking up ways to use a particular item. Angelina certainly fits into this category.
If you’re not familiar with Angelina, it comes in two varieties: Hot Fix and metallic. Hot Fix Angelina is a soft polyester fiber that bonds to itself when heated. The metallic Angelinas are aluminum and do not bond to each other.
The iridescent fibers of Hot Fix Angelina are absolutely gorgeous. The names themselves give you a hint of their star power: Calypso Blue, Lemon Sparkle, Ultra Violet, Peacock, Forest Blaze, and many others. Making things even more interesting, you can mix the different colors and arrive at a totally new palette.
For fiber artists, Angelina holds a world of possibilities because it can be bonded, spun with other fibers, painted, embossed, stitched, mixed with roving or silk fibers, cut into shapes, appliquéd, and overheated. It’s also nontoxic, readily available, and easy to work with.
With that little introduction, here’s a fun project to get you acquainted with this unique fiber. You will need a package of Angelina, a nonstick pressing sheet or some parchment paper, some decorative thread clippings, an iron, a stencil, a chalk marker, some decorative sewing threads, and a piece of fabric cut to any size you desire.
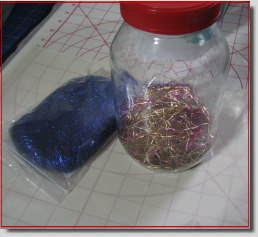
First, pull out a small amount of Angelina and lay it on your pressing sheet. Next, drop some decorative (preferably metallic) thread clipping on top of the Angelina. Pull a little more Angelina out of its bag and place it on top of the pile. Fold your pressing sheet over on top of the pile or top with parchment paper.
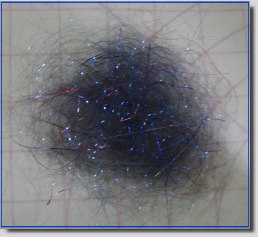
With your iron set at “silk,” gently iron back and forth on the surface for approximately three (3) seconds. It doesn’t take long for the fibers to bond. Lift the pressing sheet or parchment to see if the Angelina has bonded. If not, iron for another second or two and check again. You should have a thin, web-like piece of sparkling fabric.
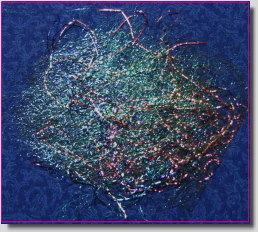
Using your stencil, mark the Angelina where you would like to cut out part of the design. I chose the center of my sun.
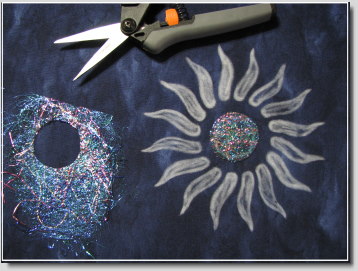
Choose a heavy fusible stabilizer or interfacing and adhere it to the back of your base fabric. You may want to double interface the area where your design will be stitched. On the surface of your fabric, position your stencil and fill in the spaces with a chalk pencil. You could also do this with a spray chalk or with fabric markers.
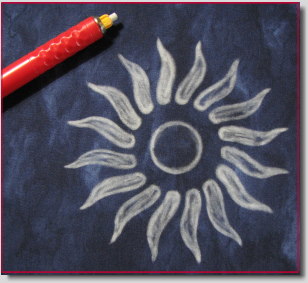
Now thread your sewing machine with a decorative thread, attach a free motion foot, drop the feed dogs, and outline stitch the parts of your design that you would like to thread paint. I used Halo thread and thread painted the rays of my sun design using multiple colors.
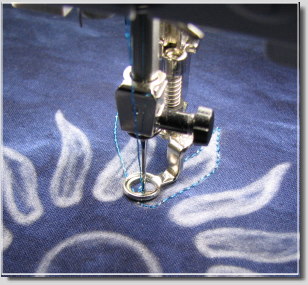
If you have never tried thread painting, this is a great place to start. Simply follow the chalk line for your outline stitching and then sew some stabilizing stitches in the center. To thread paint, just keep moving your fabric in the direction you want the stitches to go.
When you finish your design, attach the Angelina cutout with a tiny dab of fabric glue. You will be free motion stitching around it, so go light on the glue. As an alternative, you could use a basting spray such as 505.
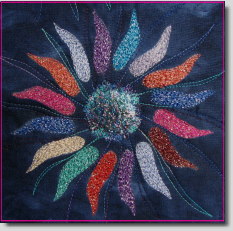
Back your fabric with batting and backing. Now free motion quilt using any pattern you like. When you reach the Angelina cutout, work in a zig zag motion to secure it. I used a variegated cotton quilting thread.
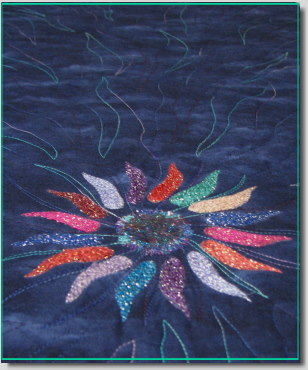
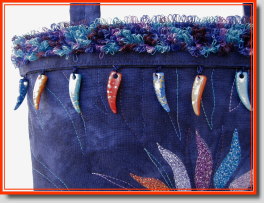
Finish your project with a binding or create another item out of it such as a tote bag, eyeglass case, place mat, etc.
You probably noticed my jar full of shiny threads. I have lots of these around the studio. Some are filled with metallic clippings, some rayon clippings, some silk clippings, and on and on it goes. You never know when you may need a little bling here or there, and with Angelina around, it may be frequently!
~~~~~~~~~~~~~~~~~~~~~~~~~~~~~
N. Rene West
Time Treasured







Vicki said,
March 3, 2007 at 9:58 pm
What a great project!
Kim said,
March 3, 2007 at 11:08 pm
very nice- thanks for sharing how you did it!
Elaine said,
March 4, 2007 at 2:06 am
What a WEALTH of incredibly valuable stitch knowledge you offer! I too can not sleep at night thinking of techniques swimming through my head and I shall dream of the jewels I’ve caught up on here tonight! Excellent review on Bernina 440 QE and Angelina ideas galore!
fembellish said,
March 4, 2007 at 7:11 am
My thanks to all of you for your kind, encouraging comments. Each one means a lot to me. I hope you have fun with the methods contained in this project.
Tammy said,
March 4, 2007 at 8:54 am
Fantastic!
Photo Buffet said,
March 4, 2007 at 10:58 am
I can see why your mind doesn’t shut off at night. You are extremely creative! Makes me wonder, when you were a child, did you throw yourself into crafts? When did you realize you wanted to become an artist?
This is a beautiful project. Amazing work there.
Granny Fran said,
March 5, 2007 at 3:26 am
Thanks for this great tutorial and the info about the Bernina Aurora 440 QE. I crave that stitch regulator. I sat down at the LQS and tried it out, and even though I’d never done any free motion quilting, I could do it with the BSR. Guess what is at the top of my wish list?
Ann said,
March 5, 2007 at 2:20 pm
Another great project!! After salivating over your projects with the Embellisher, I got myself one this weekend at a quilt show! Can’t wait to start playing!!!
samantha said,
March 5, 2007 at 6:07 pm
Beautiful, and thanks for sharing!
fembellish said,
March 5, 2007 at 8:18 pm
Again, everyone, thank you for your kind comments. Granny Fran, I hope that Bernina 440 QE finds its way home to your house soon. And Ann, wow, I’m so happy for you. Congratulations! I hope you’ll let me know how you like it and what kind of things you are doing with it.