While working on a project the other day, I was thinking about Angelina and how I might integrate it into a decorative trim that I could use on various accessories. My first thought went to small circles that I could attach to ribbon with beads.One thing led to another, and soon I was cutting out various shapes and playing around with ways I could mix them up to create new designs. The whole thing had a very familiar feel to it, and then it suddenly hit me. I’ve done this before!
Back in 1951, a couple of art students were doing the very same thing I had just been doing, only they were using vinyl. They noticed that the pieces stuck to glossy surfaces and began experimenting (playing) with the shapes. What has been described as the “ultimate creativity toy” was born and given the name “Colorforms.” The original Colorforms, consisting of basic shapes, were selected for the Toy Hall of Fame.
So, here I was playing with Colorforms again, only this time the fiber art version. I must admit that it has been a huge distraction every since.
To create the shapes, I digitized circles, triangles, etc., and stitched them out on an embroidery machine. I have uploaded the circle file for your personal use and placed it in the “Fem-Gratis” sidebar box for you to download. It is labeled “fjcircles.dst” and fits the 100mm (4″x4″) hoop. I will upload more shape files with future blog posts. (You will need to convert the dst format to one that works with your particular machine.)
An embroidery machine isn’t absolutely necessary, but it does facilitate the project. Alternately, you could simply draw the shapes on the backing stabilizer and cut them out if you don’t have an embroidery machine.
First, create a piece of Angelina fabric that measures approximately 4″ x 4″. If you are new to Angelina, you can find my previous instructions for working with this fiber here and here.

Angelina “Hot Fix” Fiber – Ultraviolet
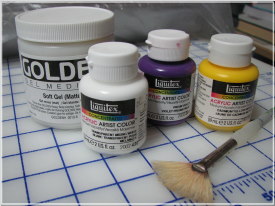
Next, cut a piece of acrylic felt (the same color as your Angelina fabric) to fit your 4′ x 4″ hoop. Saturate it with spray starch and iron. I use a 50-50 mix of starch and water. By starching the felt, you end up with a nice flat piece of colorful stabilizer. I chose felt as the stabilizer because it comes in so many colors and is readily available. However, you could also use any cutaway stabilizer and simply paint it with fabric paint before stitching the shapes. The felt adds a little more dimension, but any backing you like will do the job.

Starched Acrylic Felt
Hoop the felt and give it a light spray of 505. You will notice that my hoop has shelf liner attached to the sides. The shelf liner is a great embroidery aide, gripping whatever fabric you hoop. (If you would like to add this to your hoops, purchase the thin, inexpensive variety of mesh shelf liner found in dollar stores.) I also use a topless, bottomless, “box” made out of template plastic shaped to fit my various hoop sizes for spraying. The box protects the hoop itself from sticky residue.

Hoop Protector – 505 Spray
Position your Angelina fabric over the sprayed felt and attach the hoop to your embroidery machine.

Angelina Fabric Positioned in Hoop
Embroider the shapes, cut the jump threads, and then remove the fabric from the hoop.

Paisley Shapes Being Embroidered
Using a sharp pair of craft scissors, cut out the shapes about 1/16″ – 1/8″ beyond the stitching line.

Cut Shapes
I think you’ll find many creative uses for these little shapes in your projects.

Multiple Colored Shapes
They can be mixed and matched indefintely, giving you countless design opportunities.

Circle, Paisley, and Leaf Shapes
They would be great embellishments on ATCs (artist trading cards), trims, accessories, etc. Additionally, if you have daughters or granddaughters, this is a great way to introduce them to the world of fiber art (and an enjoyable summertime activity).
Watch for more shape files this week and see the design possibilities grow. Have fun!
~~~~~~~~~~~~~~~~~~~~~~~~~~~~~~~
Rene
Time Treasured